Thursday, March 20, 2014

Creating a Windows Guest on Oracle Database Appliance(ODA) Virtualized Platform

When it comes to deploying a Windows guest as a virtual machine on Oracle's ODA, the documentation is lacking.  After some research and trial and error, I was able to put together a process that will successfully install Windows.

The ODA utilizes the oakcli command line, so OVM is not an option.  In this post, I will walk through the steps needed to prepare and deploy a Windows 7 virtual machine.

Here is a high level summary of the steps.

1. Create an unformatted virtual disk image
2. Create a configuration file for the VM template
3. Create a shared repository
4. Import the VM template
5. Clone a VM from the template
6. Boot from iso file and install Windows
7. Configure Windows network
8. Install Paravirtialized Drivers on Windows guest
9. Modify VM's network


NOTE: For the purposes of this example, all logins for Dom0 and ODA_BASE are on node 0.

First, we need to log into Domain 0 (Dom0) and create an empty unformatted virtual disk image.  The image file name must be System.img.  In the example below, the file size is fixed at 50G.

$ mkdir /OVS/staging/vm_temp/win7x64

$ dd if=/dev/zero of=/OVS/staging/vm_temp/win7x64/System.img oflag=direct bs=1M count=51200


In the same staging directory, create a vm.cfg file with the following content.  The "boot" parameter is set as "dc" which sets the CDROM first in the boot order.  The "disk" parameter names the System.img file created above as the device "hda" in "read/write" mode.  Before the Paravirtualized Drivers(PV) get installed, the "vif" parameter needs to be set with a type of "ioemu".  Later, when the VM is started, a vnc session for the console will be started.  The vnc port is set in the "vfb" parameter with a vncdisplay of 10.  The 10 sets the port to 5910.  A value of 1 would set it to 5901.

kernel = 'hvmloader'
builder = 'hvm'
vcpus = '4'
memory = '4096'
boot = 'dc'
disk = ['file:/OVS/staging/vm_temp/win7x64/System.img,hda,w']
name = 'win7x64'
vif = [ 'type=ioemu,bridge=net1' ]
on_poweroff = 'destroy'
on_reboot = 'destroy'
on_crash = 'destroy'
acpi = '1'
apic = '1'
usbdevice='tablet'
vfb = [ 'type=vnc,vnclisten=0.0.0.0,vncdisplay=10' ]


The next step is creating the tar file containing the two files created above to be imported.

$ cd /OVS/staging/vm_temp/win7x64

$ tar -Sczvf win7x64.tgz System.img vm.cfg


There are default repositories created as part of the ODA_BASE.  The repos "odarepo1" and "odarepo2" are local repositories and will not allow VMs running from these repos to fail over to the other node.  To avoid this, create a shared repository.

NOTE:  Once you create the repo, the size cannot be changed, so plan accordingly.

Log on to ODA_BASE and run the following command to create a 150GB shared repository in the DATA disk group.

$ oakcli create repo odashr -size 150G -dg DATA


Now the environment is set up to import the template.  Login to ODA_BASE as root and run the following command.

$ oakcli import vmtemplate tmpl_win7x64 -files "/OVS/staging/vm_temp/win7x64/win7x64.tgz" -repo odashr -node 0


Once the template has been imported, the VM can finally be cloned.  Using the vmtemplate, run the following command on ODA_BASE.

$ oakcli clone vm vm_win7x64 -vmtemplate tmpl_win7x64 -repo odashr -node 0


Copy the Windows installation iso file to a staging location on Dom0.  Then modify the file /OVS/Repositories/odashr/VirtualMachines/vm_win7x64/vm.cfg on Dom0 by adding the iso as a CDROM.  Below, the iso file /OVS/staging/X17-24281.iso has been defined as device "hdc" and made read only.

disk = [u'file:/OVS/Repositories/odashr/VirtualMachines/vm_win7x64/System.img,hda,w', 'file:/OVS/staging/X17-24281.iso,hdc:cdrom,r']


Now start the VM by logging into ODA_BASE and running the following command.

$ oakcli start vm vm_win7x64


Once the VM starts, log onto Dom0 and attach to the console with a VNC client using the vnc port defined above.  In our example, the port is 5910.  From the VNC console, you need to install Windows.

After the installation is complete, log into Dom0 and modify the /OVS/Repositories/odashr/VirtualMachines/vm_win7x64/vm.cfg file.  Change the boot parameter from "dc" to "cd".  This will name the boot device to the virtual hard drive rather than the CDROM.

Log into ODA_BASE and restart the VM.

$ oakcli stop vm vm_win7x64

$ oakcli start vm vm_win7x64


Now attach to your vnc session again and configure the network settings for the VM guest as per your requirements.  Once the network is configured and functioning, you can download the Windows PV Drivers to the guest and install them by running the executable.  As of the date of this post, the PV drivers can be downloaded from edelivery.oracle.com.  Go to "Cloud Portal Oracle Linux/VM", and enter "Oracle VM" for the product pack and "x86 64 bit" for the platform.

After the PV drivers have been installed, modify the /OVS/Repositories/odashr/VirtualMachines/vm_win7x64/vm.cfg file by changing the "vif" parameter as follows.

From

vif = [ 'type=ioemu,bridge=net1']

To

vif = [ 'type=netfront,bridge=net1']


Now restart your VM, and the guest should be ready for use.  If you want to by-pass using the vnc session, configure remote desktop and connect to the console.

$ oakcli stop vm vm_win7x64

$ oakcli start vm vm_win7x64


Tuesday, February 18, 2014

SQL Tuning: Using Oracle's Global Hints With Multiple Query Blocks

There's nothing much more frustrating than knowing how to tune a query, but being unable to due to one or more third party views that cannot be modified.  A great way to work around this is by using Oracle's global hints in the main query block.  This is accomplished by referring to the view name and the table name with this format /*+ hint(view.table) */.

According to Oracle's documentation, however, the optimizer ignores global hints in this format that refer to multiple query blocks.  So if you wanted to use the "leading" hint with more than one view like this /*+ leading(view1.table1 view2.table2) */, Oracle will not utilize your input, and you will be left banging your head against the wall.

Luckily, there is another format for referencing these query blocks, but it takes a little digging to get it right.  In the following example, I will create a table with a view that references it along with another view on the ever famous "dual" table.  These two views will be joined in a query and we will see what options there are for manipulating the execution plan without changing the views.

Here are the table and view statements to set up the example.

CREATE TABLE orders AS
SELECT
        LEVEL order_id,
        SYSDATE + DBMS_RANDOM.VALUE(-1000, 1000) order_date,
        DBMS_RANDOM.STRING('A', 20) comments
FROM dual
CONNECT BY LEVEL <= 100000;


CREATE INDEX order_id_ix ON orders ( order_id );

CREATE INDEX order_dt_id_ix ON orders ( order_date, order_id );


CREATE VIEW vw_orders AS
SELECT * FROM orders;

CREATE VIEW vw_dual AS
SELECT * FROM dual;

Here is a basic query which joins the two views

SELECT /*+ gather_plan_statistics */
        order_id,
        order_date,
        comments
FROM vw_orders,
        vw_dual
WHERE TRUNC(order_date) = TO_DATE('12-JAN-13','DD-MON-YY')
AND order_id = 1;


After running the query, we can take a look at the execution plan chosen by the optimizer with the following script.

set pages 999
set lines 200

SELECT * FROM TABLE(DBMS_XPLAN.DISPLAY_CURSOR
        (
        null,
        null,
        'allstats'
        ));


The plan shows that DUAL is the driving table and a nested loop is utilized to access the ORDERS table via an index.

PLAN_TABLE_OUTPUT
--------------------------------------------------------------------------------------------------------------------------------------------------------------------------------------------------------
SQL_ID  dh3p87qwt5njy, child number 0
-------------------------------------
SELECT /*+ gather_plan_statistics */ order_id,  order_date,
comments FROM vw_orders,  vw_dual WHERE TRUNC(order_date) =
TO_DATE('12-JAN-13','DD-MON-YY') AND order_id = 1

Plan hash value: 1760841149

------------------------------------------------------------------------------------------------------
| Id  | Operation                    | Name        | Starts | E-Rows | A-Rows |   A-Time   | Buffers |
------------------------------------------------------------------------------------------------------
|   0 | SELECT STATEMENT             |             |      1 |        |      1 |00:00:00.01 |       4 |
|   1 |  NESTED LOOPS                |             |      1 |      9 |      1 |00:00:00.01 |       4 |
|   2 |   FAST DUAL                  |             |      1 |      1 |      1 |00:00:00.01 |       0 |
|*  3 |   TABLE ACCESS BY INDEX ROWID| ORDERS      |      1 |      9 |      1 |00:00:00.01 |       4 |
|*  4 |    INDEX RANGE SCAN          | ORDER_ID_IX |      1 |      9 |      1 |00:00:00.01 |       3 |
------------------------------------------------------------------------------------------------------

Predicate Information (identified by operation id):
---------------------------------------------------

   3 - filter(TRUNC(INTERNAL_FUNCTION("ORDER_DATE"))=TO_DATE('12-JAN-13','DD-MON-YY'))
   4 - access("ORDER_ID"=1)

Note
-----
   - dynamic sampling used for this statement (level=2)


34 rows selected.


Now, if we want to force the optimizer to use a full table scan on the ORDERS table, we can throw in a global hint that references the view and the table.  As you can see from the execution plan, the optimizer follows the directive and a full table scan is performed.

SELECT /*+ gather_plan_statistics full(vw_orders.orders) */
        order_id,
        order_date,
        comments
FROM vw_orders,
        vw_dual
WHERE TRUNC(order_date) = TO_DATE('12-JAN-13','DD-MON-YY')
AND order_id = 1;


PLAN_TABLE_OUTPUT
--------------------------------------------------------------------------------------------------------------------------------------------------------------------------------------------------------
SQL_ID  9xby7nxuz82tc, child number 0
-------------------------------------
SELECT /*+ gather_plan_statistics full(vw_orders.orders) */
order_id,  order_date,  comments FROM vw_orders,  vw_dual WHERE
TRUNC(order_date) = TO_DATE('12-JAN-13','DD-MON-YY') AND order_id = 1

Plan hash value: 2691672058

---------------------------------------------------------------------------------------
| Id  | Operation          | Name   | Starts | E-Rows | A-Rows |   A-Time   | Buffers |
---------------------------------------------------------------------------------------
|   0 | SELECT STATEMENT   |        |      1 |        |      1 |00:00:00.01 |     545 |
|   1 |  NESTED LOOPS      |        |      1 |      9 |      1 |00:00:00.01 |     545 |
|   2 |   FAST DUAL        |        |      1 |      1 |      1 |00:00:00.01 |       0 |
|*  3 |   TABLE ACCESS FULL| ORDERS |      1 |      9 |      1 |00:00:00.01 |     545 |
---------------------------------------------------------------------------------------

Predicate Information (identified by operation id):
---------------------------------------------------

   3 - filter(("ORDER_ID"=1 AND TRUNC(INTERNAL_FUNCTION("ORDER_DATE"))=TO_DATE(
              '12-JAN-13','DD-MON-YY')))

Note
-----
   - dynamic sampling used for this statement (level=2)


32 rows selected.


If we try the same approach with the "leading" hint which references more than one query block, Oracle is not so cooperative.  After running this example, we see that the "leading" hint is ignored and DUAL is still the driving table.

SELECT /*+ gather_plan_statistics full(vw_orders) leading(vw_orders.orders vw_dual.dual) */
        order_id,
        order_date,
        comments
FROM vw_orders,
        vw_dual
WHERE TRUNC(order_date) = TO_DATE('12-JAN-13','DD-MON-YY')
AND order_id = 1;


PLAN_TABLE_OUTPUT
--------------------------------------------------------------------------------------------------------------------------------------------------------------------------------------------------------
SQL_ID  cbp5hxyg5mjkx, child number 0
-------------------------------------
SELECT /*+ gather_plan_statistics full(vw_orders)
leading(vw_orders.orders vw_dual.dual) */ order_id,  order_date,
comments FROM vw_orders,  vw_dual WHERE TRUNC(order_date) =
TO_DATE('12-JAN-13','DD-MON-YY') AND order_id = 1

Plan hash value: 2691672058

---------------------------------------------------------------------------------------
| Id  | Operation          | Name   | Starts | E-Rows | A-Rows |   A-Time   | Buffers |
---------------------------------------------------------------------------------------
|   0 | SELECT STATEMENT   |        |      1 |        |      1 |00:00:00.01 |     545 |
|   1 |  NESTED LOOPS      |        |      1 |      9 |      1 |00:00:00.01 |     545 |
|   2 |   FAST DUAL        |        |      1 |      1 |      1 |00:00:00.01 |       0 |
|*  3 |   TABLE ACCESS FULL| ORDERS |      1 |      9 |      1 |00:00:00.01 |     545 |
---------------------------------------------------------------------------------------

Predicate Information (identified by operation id):
---------------------------------------------------

   3 - filter(("ORDER_ID"=1 AND TRUNC(INTERNAL_FUNCTION("ORDER_DATE"))=TO_DATE(
              '12-JAN-13','DD-MON-YY')))

Note
-----
   - dynamic sampling used for this statement (level=2)


33 rows selected.


In order to give the optimizer the information it needs in this situation, we need to change our "DBMS_XPLAN" script so it will include the "alias" and the "outline" information.  In the "DBMS_XPLAN" script below, I have also eliminated the "predicate" and "note" data.


SELECT /*+ gather_plan_statistics */
        order_id,
        order_date,
        comments
FROM vw_orders,
        vw_dual
WHERE TRUNC(order_date) = TO_DATE('12-JAN-13','DD-MON-YY')
AND order_id = 1;


set pages 999
set lines 200

SELECT * FROM TABLE(DBMS_XPLAN.DISPLAY_CURSOR
        (
        null,
        null,
        'allstats +alias +outline -note -predicate'
        ));


PLAN_TABLE_OUTPUT
--------------------------------------------------------------------------------------------------------------------------------------------------------------------------------------------------------
SQL_ID  12b497umk9ytc, child number 0
-------------------------------------
SELECT /*+ gather_plan_statistics */ order_id,  order_date,
comments FROM vw_orders,  vw_dual WHERE TRUNC(order_date) =
TO_DATE('12-JAN-13','DD-MON-YY') AND order_id = 1

Plan hash value: 1760841149

------------------------------------------------------------------------------------------------------
| Id  | Operation                    | Name        | Starts | E-Rows | A-Rows |   A-Time   | Buffers |
------------------------------------------------------------------------------------------------------
|   0 | SELECT STATEMENT             |             |      1 |        |      1 |00:00:00.01 |       4 |
|   1 |  NESTED LOOPS                |             |      1 |      9 |      1 |00:00:00.01 |       4 |
|   2 |   FAST DUAL                  |             |      1 |      1 |      1 |00:00:00.01 |       0 |
|   3 |   TABLE ACCESS BY INDEX ROWID| ORDERS      |      1 |      9 |      1 |00:00:00.01 |       4 |
|   4 |    INDEX RANGE SCAN          | ORDER_ID_IX |      1 |      9 |      1 |00:00:00.01 |       3 |
------------------------------------------------------------------------------------------------------

Query Block Name / Object Alias (identified by operation id):
-------------------------------------------------------------

   1 - SEL$5428C7F1
   2 - SEL$5428C7F1 / DUAL@SEL$3
   3 - SEL$5428C7F1 / ORDERS@SEL$2
   4 - SEL$5428C7F1 / ORDERS@SEL$2

Outline Data
-------------

  /*+
      BEGIN_OUTLINE_DATA
      IGNORE_OPTIM_EMBEDDED_HINTS
      OPTIMIZER_FEATURES_ENABLE('11.2.0.2')
      DB_VERSION('11.2.0.2')
      ALL_ROWS
      OUTLINE_LEAF(@"SEL$5428C7F1")
      MERGE(@"SEL$2")
      MERGE(@"SEL$3")
      OUTLINE(@"SEL$1")
      OUTLINE(@"SEL$2")
      OUTLINE(@"SEL$3")
      INDEX_RS_ASC(@"SEL$5428C7F1" "ORDERS"@"SEL$2" ("ORDERS"."ORDER_ID"))
      LEADING(@"SEL$5428C7F1" "DUAL"@"SEL$3" "ORDERS"@"SEL$2")
      USE_NL(@"SEL$5428C7F1" "ORDERS"@"SEL$2")
      END_OUTLINE_DATA
  */


53 rows selected.


In the output above, the operations are numbered in the execution plan.  These numbers correspond to the numbers identifying the query block and object alias.  These two query blocks and aliases are found in the outline section with a leading hint.  This leading hint can be modified by listing the ORDERS table first as shown below and using the ORDERS alias in the full table scan hint as well.  The optimizer now accepts the hints and executes the query as directed.

SELECT /*+ gather_plan_statistics full(@"SEL$5428C7F1" "ORDERS"@"SEL$2") leading(@"SEL$5428C7F1" "ORDERS"@"SEL$2" "DUAL"@"SEL$3") */
        order_id,
        order_date,
        comments
FROM vw_orders,
        vw_dual
WHERE TRUNC(order_date) = TO_DATE('12-JAN-13','DD-MON-YY')
AND order_id = 1;

PLAN_TABLE_OUTPUT
--------------------------------------------------------------------------------------------------------------------------------------------------------------------------------------------------------
SQL_ID bpy75y38s6phy, child number 0
-------------------------------------
SELECT /*+ gather_plan_statistics full(@"SEL$5428C7F1"
"ORDERS"@"SEL$2") leading(@"SEL$5428C7F1" "ORDERS"@"SEL$2"
"DUAL"@"SEL$3") */    order_id,      order_date,
comments FROM vw_orders,  vw_dual WHERE TRUNC(order_date) =
TO_DATE('12-JAN-13','DD-MON-YY') AND order_id = 1

Plan hash value: 795833099

-----------------------------------------------------------------------------------------
| Id  | Operation            | Name   | Starts | E-Rows | A-Rows |   A-Time   | Buffers |
-----------------------------------------------------------------------------------------
|   0 | SELECT STATEMENT     |        |      1 |        |      0 |00:00:00.01 |     544 |
|   1 |  MERGE JOIN CARTESIAN|        |      1 |     10 |      0 |00:00:00.01 |     544 |
|   2 |   TABLE ACCESS FULL  | ORDERS |      1 |     10 |      0 |00:00:00.01 |     544 |
|   3 |   BUFFER SORT        |        |      0 |      1 |      0 |00:00:00.01 |       0 |
|   4 |    FAST DUAL         |        |      0 |      1 |      0 |00:00:00.01 |       0 |
-----------------------------------------------------------------------------------------

Query Block Name / Object Alias (identified by operation id):
-------------------------------------------------------------

   1 - SEL$5428C7F1
   2 - SEL$5428C7F1 / ORDERS@SEL$2
   4 - SEL$5428C7F1 / DUAL@SEL$3

Outline Data
-------------

  /*+
      BEGIN_OUTLINE_DATA
      IGNORE_OPTIM_EMBEDDED_HINTS
      OPTIMIZER_FEATURES_ENABLE('12.1.0.1')
      DB_VERSION('12.1.0.1')
      ALL_ROWS
      OUTLINE_LEAF(@"SEL$5428C7F1")
      MERGE(@"SEL$2")
      MERGE(@"SEL$3")
      OUTLINE(@"SEL$1")
      OUTLINE(@"SEL$2")
      OUTLINE(@"SEL$3")
      FULL(@"SEL$5428C7F1" "ORDERS"@"SEL$2")
      LEADING(@"SEL$5428C7F1" "ORDERS"@"SEL$2" "DUAL"@"SEL$3")
      USE_MERGE_CARTESIAN(@"SEL$5428C7F1" "DUAL"@"SEL$3")
      END_OUTLINE_DATA
  */


48 rows selected.


Friday, February 7, 2014

Using Linux's Logrotate to Manage Alert and Listener Log Files

If you are running Oracle on Linux, there is a handy little utility called logrotate that can be used to manage those unwieldy alert logs and listener logs.

I recently worked on a client's database, and their alert log had information going back four years. When trying to examine the log with vi, it would take several minutes to open the file due to it's enormity. To help them out, I used this simple little tool to keep the files in check.

As root, I simply created a new file in /etc/logrotate.d on each RAC node called ora_cleanup. The example below is from node 2. This will copy the alert log with a numerical extension and truncate the existing file. It performs this monthly and keeps 13 months worth of log information before deleting old files. The listener log grows much faster, so it is configured to rotate weekly and keep 53 weeks of files. The copytruncate parameter is important for the listener log because the listener process holds an open handle on the existing file.

# alert log
/u01/app/oracle/diag/rdbms/orcl/orcl2/trace/alert_orcl2.log {
monthly
rotate 13
notifempty
missingok
copytruncate
nocreate
}

# listener log
/u01/app/asm/diag/tnslsnr/db102/listener_db102/trace/listener_db102.log {
weekly
rotate 53
notifempty
missingok
copytruncate
nocreate
}

After a few months, this is what the managed files look like in their directories.

$ cd /u01/app/oracle/diag/rdbms/orcl/orcl2/trace
$ ls -arltp alert_orcl2*
-rw-rw---- 1 oracle oinstall 50051579 Oct 10 15:17 alert_orcl2.log.5
-rw-rw---- 1 oracle oinstall   993219 Nov  1 04:02 alert_orcl2.log.4
-rw-rw---- 1 oracle oinstall  1124244 Dec  1 04:02 alert_orcl2.log.3
-rw-rw---- 1 oracle oinstall  1088332 Jan  1 04:02 alert_orcl2.log.2
-rw-rw---- 1 oracle oinstall  2163268 Feb  1 04:02 alert_orcl2.log.1
-rw-rw---- 1 oracle oinstall   279484 Feb  7 09:34 alert_orcl2.log

$ cd /u01/app/asm/diag/tnslsnr/db102/listener_db102/trace
$ ls -arltp listener_db102*
-rw-rw---- 1 oracle oinstall 3857048716 Oct 10 15:28 listener_db102.log.18
-rw-rw---- 1 oracle oinstall  196362891 Oct 18 13:13 listener_db102.log.17
-rw-rw---- 1 oracle oinstall   40298571 Oct 20 04:02 listener_db102.log.16
-rw-rw---- 1 oracle oinstall  178408740 Oct 27 04:02 listener_db102.log.15
-rw-rw---- 1 oracle oinstall  188301497 Nov  3 04:02 listener_db102.log.14
-rw-rw---- 1 oracle oinstall  185073120 Nov 10 04:02 listener_db102.log.13
-rw-rw---- 1 oracle oinstall  178345071 Nov 17 04:02 listener_db102.log.12
-rw-rw---- 1 oracle oinstall  178945914 Nov 24 04:02 listener_db102.log.11
-rw-rw---- 1 oracle oinstall  165829858 Dec  1 04:02 listener_db102.log.10
-rw-rw---- 1 oracle oinstall  179395363 Dec  8 04:02 listener_db102.log.9
-rw-rw---- 1 oracle oinstall  175671704 Dec 15 04:02 listener_db102.log.8
-rw-rw---- 1 oracle oinstall  195136727 Dec 22 04:02 listener_db102.log.7
-rw-rw---- 1 oracle oinstall  195512012 Dec 29 04:02 listener_db102.log.6
-rw-rw---- 1 oracle oinstall  201759600 Jan  5 04:02 listener_db102.log.5
-rw-rw---- 1 oracle oinstall  204589312 Jan 12 04:02 listener_db102.log.4
-rw-rw---- 1 oracle oinstall  213276652 Jan 19 04:02 listener_db102.log.3
-rw-rw---- 1 oracle oinstall  212229296 Jan 26 04:02 listener_db102.log.2
-rw-rw---- 1 oracle oinstall  211244326 Feb  2 04:02 listener_db102.log.1
-rw-rw---- 1 oracle oinstall  159275570 Feb  7 09:35 listener_db102.log


Tuesday, January 28, 2014

GoldenGate: 12c Conflict Detection and Resolution (CDR)

One of my favorite 12c enhancement for GoldenGate is its new conflict detection resolution (CDR) feature for two way replication.  In previous version, the replicat parameter files had to contain SQLEXEC commands that would query the target table before applying any DML.  This added an additional call to the database and slowed performance.

CDR provides new parameters that simplify the detection and resolution of conflicting data.  Here are some of the optional keywords that can be combined with the new RESOLVECONFLICT parameter.

UPDATEROWEXISTS
UPDATEROWMISSING
INSERTROWEXISTS
INSERTROWMISSING
DELETEROWEXISTS
DELETEROWMISSING

These can be configured to regard one data source the master and always overwrite the other.  They can utilize a timestamp column that determines the "winner" based on the most recent data.  For data such as inventory, the "delta" can be used to make changes to both sites and adjust the value rather than simply replicating it.

GoldenGate requires the "before" images to be captured for all relevant columns in the source database.  Here is how trandata can be configured for all columns in the SCOTT schema in the PDBORCL pluggable database.

GGSCI (oel1.localdomain) 103> ADD SCHEMATRANDATA pdborcl.scott ALLCOLS

2014-01-20 15:21:04  INFO    OGG-01788  SCHEMATRANDATA has been added on schema scott.

2014-01-20 15:21:05  INFO    OGG-01976  SCHEMATRANDATA for scheduling columns has been added on schema scott.

2014-01-20 15:21:05  INFO    OGG-01977  SCHEMATRANDATA for all columns has been added on schema scott.


In addition, the extract parameter files need the GETBEFORECOLS option as a part of the TABLE parameter.  In the example below, the extract will capture all of the columns in the SCOTT.ITEMS table for each update and delete.  The before image of each of these records will be loaded into the trail file.

EXTRACT e1aa
USERIDALIAS ggsadm domain d1
LOGALLSUPCOLS
EXTTRAIL ./dirdat/aa

TABLE pdborcl.scott.emp;
TABLE pdborcl.scott.dept;

SOURCECATALOG pdborcl
TABLE scott.bonus;
TABLE scott.salgrade;
TABLE scott.items,
  GETBEFORECOLS
    (
    ON UPDATE ALL,
    ON DELETE ALL
    );


The final step is to configure the replicat parameter files with the RESOLVECONFLICT paramter.  In the example below, CDR is configured for the SCOTT.ITEMS table.  If the record exists on the target for an update, the DML_TIMESTAMP column will be compared, and the record with the most recent time will "win" for all of the columns except QTY_ON_HAND.  This column will be updated with the difference between the old and new record value on the source using the UPDATEROWEXISTS and USEDELTA keywords.

For example:  If QTY_ON_HAND is updated on both databases in a bi-directional replication setup, the change needs to be reflected appropriately on each system.  Let's say that the value on both system starts out at 22.  The value on DB1 is decremented to 18, while the value on DB2 is incremented to 30.  When the two updates pass each other and get applied on their respective targets, the records cannot simply be replicated as is.  Simple arithmetic must be applied to both sides in order to account for the change in inventory on both sides.  The "delta" for DB1 is -4.  The "delta" for DB2 is +8.  Therefore, the value on DB1 (18) will be incremented by 8 for a new total of 26. The value on DB2 (30) will be decremented by 4 for a new total of 26.  Now, rather than having a "winner", both sources of data will be equal based on the "delta".

The replicat parameter file below is set up for such a situation.

REPLICAT r2aa
USERIDALIAS ggsadm domain d2
ASSUMETARGETDEFS

MAP pdborcl.scott.emp, TARGET scott.emp;
MAP pdborcl.scott.dept, TARGET scott.dept;

SOURCECATALOG pdborcl
MAP scott.bonus, TARGET scott.bonus;
MAP scott.salgrade, TARGET scott.salgrade;
MAP scott.items, TARGET scott.items,
  COMPARECOLS
    (
    ON UPDATE KEYINCLUDING (item_name, qty_on_hand, sales_price, dml_timestamp),
    ON DELETE KEYINCLUDING (item_name, qty_on_hand, sales_price, dml_timestamp)
    ),
  RESOLVECONFLICT (UPDATEROWEXISTS,
                     (delta_combine, USEDELTA, COLS (qty_on_hand)),
                     (DEFAULT, USEMAX (dml_timestamp))),
  RESOLVECONFLICT (INSERTROWEXISTS, (DEFAULT, USEMAX (dml_timestamp))),
  RESOLVECONFLICT (DELETEROWEXISTS, (DEFAULT, OVERWRITE)),
  RESOLVECONFLICT (UPDATEROWMISSING, (DEFAULT, OVERWRITE)),
  RESOLVECONFLICT (DELETEROWMISSING, (DEFAULT, DISCARD))
  ;

Wednesday, January 8, 2014

GoldenGate: 12c Credential Store Secure Login

The Credential Store is a new 12c security feature in GoldenGate that has been implemented as an autologin wallet in Oracle’s Credential Store Framework.  User IDs and passwords are encrypted in the store and, as a result, an encryption key in the connection string is no longer needed.

The default location of the store is in the ./dircrd directory of the GoldenGate software home.  If you want to change the location, you can edit the ./GLOBALS file with the following CREDENTIALSTORELOCATION parameter.

GGSCI> edit params ./GLOBALS


CREDENTIALSTORELOCATION /home/oracle/ggs/dircrd


You must exit and restart ggsci before proceeding or the file will be created in the default location.

GGSCI> exit

$ ./ggsci

GGSCI> add credentialstore

Credential store created in /home/oracle/ggs/dircrd/.

GGSCI> exit

$ ls /home/oracle/ggs/dircrd
cwallet.sso


Once the credential store has been created, users and password can be added to it.  One of the key features of the store is the use of domains which can be used to logically group login aliases.  The same alias can be defined in different domains with different credentials.  This can be handy when developing and testing in different database environments from the same GoldenGate installation.  The default domain is “Oracle GoldenGate”.

In this example, the user c##ggsadmin is added to the store in the “test” domain.  If the “password” keyword is omitted, GoldenGate will prompt for the password and hide it from the output.

GGSCI> alter credentialstore add user c##ggsadmin, alias ggsadm, domain test
Password:

Credential store in /home/oracle/ggs/dircrd/ altered.


If you want to see the information maintained in the store, you can use the INFO CREDENTIONSTORE command.  If you don’t specify the domain, it will default to “Oracle GoldenGate”.  As you can see below, the default domain is still empty.

GGSCI> info credentialstore

Reading from /home/oracle/ggs/dircrd/:

No information found in credential store.

GGSCI> info credentialstore domain test

Reading from /home/oracle/ggs/dircrd/:

Domain: test
  Alias: ggsadm
  Userid: c##ggsadmin


In older version of GoldenGate, you had to supply the username and password in plain text or encrypted for your login credentials.


Using DBLOGIN at the command line.

GGSCI> DBLOGIN USERID c##ggsadmin@orcl, PASSWORD AACAAAAAAAAAAAJAUEUGODSCVGJEEIUGKJDJTFNDKEJFFFTC AES128, ENCRYPTKEY securekey1

Successfully logged into database CDB$ROOT.


Using credentials in the parameter files.

GGSCI> edit params e1aa


EXTRACT e1aa
USERID c##ggsadmin@orcl, PASSWORD AACAAAAAAAAAAAJAUEUGODSCVGJEEIUGKJDJTFNDKEJFFFTC AES128, ENCRYPTKEY securekey1
LOGALLSUPCOLS
EXTTRAIL ./dirdat/aa

TABLE pdborcl.scott.emp;
TABLE pdborcl.scott.dept;

SOURCECATALOG pdborcl
TABLE scott.bonus;
TABLE scott.salgrade;


In 12c, the credential store secures the information and makes the connection much easier through the use of the alias that was created.


Using DBLOGIN at the command line.

GGSCI> dblogin useridalias ggsadm domain test

Successfully logged into database CDB$ROOT.


Using credentials in the parameter files.

GGSCI> edit params e1aa


EXTRACT e1aa
USERIDALIAS ggsadm domain test
LOGALLSUPCOLS
EXTTRAIL ./dirdat/aa

TABLE pdborcl.scott.emp;
TABLE pdborcl.scott.dept;

SOURCECATALOG pdborcl
TABLE scott.bonus;
TABLE scott.salgrade;

Tuesday, December 24, 2013

GoldenGate: Integrated Capture and Apply on 12c Multitenant Databases

With the new features of GoldenGate 12c and the architectural changes brought on by the multitenant databases, there also come some new requirements for configuring replication.

In order to create an extract process for a multitenant database, it must be created at the root container level with a "common" database user and must be defined to run in the "integrated" capture mode. Replicats, on the other hand, must be created at the pluggable database level and can be defined to run in either the "classic" or "integrated" modes.

Below, I will step through the configuration of the databases, extract, and replicat for a multitenent environment.  In this example, there are two databases sharing a host, so there is no pump and there is only one GoldenGate environment.

GoldenGate

Version - 12.1.2.0

Source Database

Version - 12.1.0.1
Root SID - orcl
Pluggable Databases - pdborcl, pdb2orcl

Target Database

Version - 12.1.0.1
Root SID - orcl2
Pluggable Databases - pdborcl2, pdb2orcl2

Preparing the source database includes the creation of a "common" user, adding supplemental logging at the database level, enabling flashback query, and properly setting the streams_pool_size init parameter.


On the source, enable supplemental logging in the root container.

$ . oraenv

ORACLE_SID = [orcl] ? orcl

The Oracle base remains unchanged with value /u01/app/oracle

$ sqlplus / as sysdba

SQL> show con_name

CON_NAME
------------------------------
CDB$ROOT


SQL> alter database add supplemental log data;

Database altered.


SQL> alter database force logging;

Database altered.


SQL> select supplemental_log_data_min, force_logging from v$database;

SUPPLEME FORCE_LOGGING
-------- ---------------------------------------
YES  YES


SQL> alter system switch logfile;

System altered.


On the source, enable flashback query by setting UNDO_MANAGEMENT to AUTO and UNDO_RETENTION to a value that makes sense for your environment.

SQL> show parameter undo

NAME         TYPE  VALUE
------------------------------------ ----------- ------------------------------
temp_undo_enabled       boolean  FALSE
undo_management        string  AUTO
undo_retention        integer  900
undo_tablespace        string  UNDOTBS1


On the source, create a common GoldenGate admin user in the root and pluggable databases.

SQL> create user c##ggsadmin identified by ggsadmin
     default tablespace ggsdata
     temporary tablespace temp
     container=all;

User created.


SQL> grant dba to c##ggsadmin container=all;

Grant succeeded.


SQL> grant flashback any table to c##ggsadmin container=all;

Grant succeeded.


Each extract process will use 1G of the streams pool.   Make sure you add space to the streams pool based on the number of extracts in your GoldenGate environment.

SQL> show parameter streams

NAME         TYPE  VALUE
------------------------------------ ----------- ------------------------------
streams_pool_size       big integer 1280M


On the source, create the extract parameter file ./dirprm/e1aa.prm.  Notice that the TABLE parameter must include the container name along with the schema.  Alternatively, the SOURCECATALOG parameter may be utilized.  Examples of both are in this file.  If configuring an integrated replicat, use the required LOGALLSUPCOLS parameter in the extract to capture the before and after values of the primary key, unique indexes, and foreign keys.

EXTRACT e1aa
USERID c##ggsadmin@orcl, PASSWORD ggsadmin
LOGALLSUPCOLS
EXTTRAIL ./dirdat/aa

TABLE pdborcl.scott.emp;
TABLE pdborcl.scott.dept;

SOURCECATALOG pdborcl
TABLE scott.bonus;
TABLE scott.salgrade;


On the source, start GGSCI and add supplemental logging for the objects to be replicated, create and register the extract, and create the trail file.  The name of the container must precede the schema name.

$ ./ggsci

GGSCI (oel1.localdomain) 2> dblogin userid c##ggsadmin, password ggsadmin

Successfully logged into database CDB$ROOT.


GGSCI (oel1.localdomain) 3> add schematrandata pdborcl.scott


2013-12-24 08:52:01  INFO    OGG-01788  SCHEMATRANDATA has been added on schema scott.


2013-12-24 08:52:02  INFO    OGG-01976  SCHEMATRANDATA for scheduling columns has been added on schema scott.


GGSCI (oel1.localdomain) 2> add extract e1aa, integrated tranlog, begin now

EXTRACT added.


GGSCI (oel1.localdomain) 3> add exttrail ./dirdat/aa, extract e1aa, megabytes 100

EXTTRAIL added.


GGSCI (oel1.localdomain) 6> register extract e1aa database container (pdborcl, pdb2orcl)

Extract E1AA successfully registered with database at SCN 2139002.


GGSCI (oel1.localdomain) 9> start e1aa

Sending START request to MANAGER ...

EXTRACT E1AA starting


GGSCI (oel1.localdomain) 31> info all

Program     Status      Group       Lag at Chkpt  Time Since Chkpt

MANAGER     RUNNING                                          
EXTRACT     RUNNING     E1AA        00:00:06      00:00:09   

GGSCI (oel1.localdomain) 32> exit


On the target, create a local GoldenGate admin user in the pluggable database.

[oracle@oel1 ggs]$ . oraenv

ORACLE_SID = [orcl] ? orcl2

The Oracle base remains unchanged with value /u01/app/oracle

[oracle@oel1 ggs]$ sqlplus / as sysdba


SQL> alter session set container=pdborcl2;

Session altered.


SQL> show con_name

CON_NAME
------------------------------
PDBORCL2


SQL> create user ggsadmin identified by ggsadmin
     default tablespace ggsdata
     temporary tablespace temp
     container=current;

User created.


SQL> grant dba to ggsadmin container=current;

Grant succeeded.


SQL> exit


On the target, create the replicat parameter file ./dirprm/r2aa.prm.  There is no need to create a checkpoint table for a replicat in "integrated" mode.  Again, the MAP parameter must include the source container name.  This may also be accomplished with the SOURCECATALOG parameter.  Examples of both are in this file.

REPLICAT r2aa
USERID ggsadmin@pdborcl2, PASSWORD ggsadmin
ASSUMETARGETDEFS

MAP pdborcl.scott.emp, TARGET scott.emp;
MAP pdborcl.scott.dept, TARGET scott.dept;

SOURCECATALOG pdborcl
MAP scott.bonus, TARGET scott.bonus;
MAP scott.salgrade, TARGET scott.salgrade;


On the target, create the replicat.

$ ./ggsci

GGSCI (oel1.localdomain) 2> dblogin userid ggsadmin@pdborcl2, password ggsadmin

Successfully logged into database PDBORCL2.


GGSCI (oel1.localdomain) 3> add replicat r2aa, integrated, exttrail ./dirdat/aa

REPLICAT (Integrated) added.


GGSCI (oel1.localdomain) 8> start r2aa

Sending START request to MANAGER ...

REPLICAT R2AA starting


GGSCI (oel1.localdomain) 12> info all

Program     Status      Group       Lag at Chkpt  Time Since Chkpt

MANAGER     RUNNING                                          
EXTRACT     RUNNING     E1AA        00:00:05      00:00:05   
REPLICAT    RUNNING     R2AA        00:00:00      00:00:09


Thursday, December 19, 2013

GoldenGate: Installation of 12c Using Oracle Universal Installer (OUI)

As you know, Oracle bought GoldenGate four years ago. In its new 12c release, Oracle has now integrated the product further into its standards by offering an installation option using the OUI.

For those of you who have installed earlier versions, you're probably thinking that there's not much to the old install of unzipping a file and creating the subdirs. I agree, but it makes sense why Oracle is moving in this direction. As you'll see, the installation process updates the Oracle Inventory and there is a new OPatch directory allowing for a standard method of patching.

The documentation specifies that this version of the OUI does not support upgrades, so you'll have to revert to the old method if that is your current situation.

Here are the steps to installing GoldenGate with the new OUI.

Once you have downloaded the software, unzip it in a temporary location. Don't unzip it in the GoldenGate home as you would with the previous versions.

For my environment, the file name is 121200_fbo_ggs_Linux_x64_shiphome.zip, and it creates the subdirectory fbo_ggs_Linux_x64_shiphome.

$ cd fbo_ggs_Linux_x64_shiphome/Disk1

$ ./runInstaller


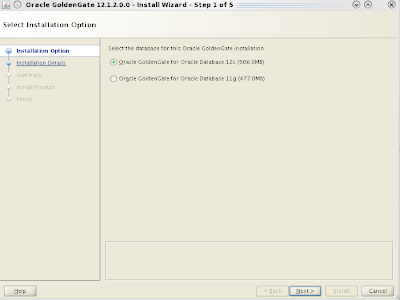
Select the version of Oracle that the capture and/or apply process will be running against.


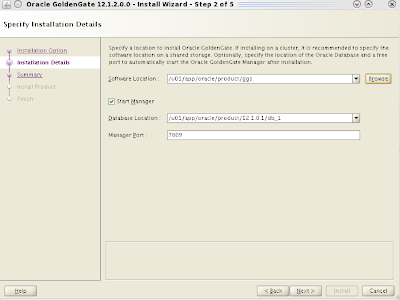
Enter the GoldenGate software home and the location of the database home that GoldenGate will be operating against.  You can also check whether or not you want the manager process to be started and customize the desired port.


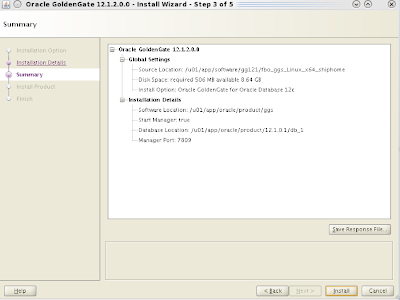
Review the options and click "Install"


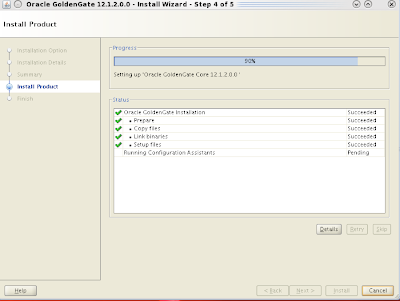
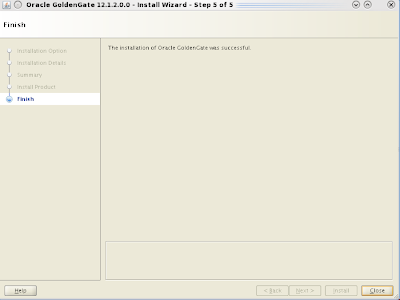
And that's it.  The installation is complete.  The subdirs have been created and the manager process has been started.

If you navigate to your new GoldenGate home that you specified above and list the contents, you'll see the OPatch directory along with all of the subdirs.

Additionally, you can navigate to the OPatch directory and list the Oracle inventory as follows.


[oracle@oel1 ggs]$ export ORACLE_HOME=/u01/app/oracle/product/ggs
[oracle@oel1 ggs]$ cd $ORACLE_HOME/OPatch
[oracle@oel1 OPatch]$ ./opatch lsinventory
Invoking OPatch 11.2.0.1.7

Oracle Interim Patch Installer version 11.2.0.1.7
Copyright (c) 2011, Oracle Corporation.  All rights reserved.
Oracle Home       : /u01/app/oracle/product/ggs
Central Inventory : /u01/app/oraInventory
   from           : /etc/oraInst.loc
OPatch version    : 11.2.0.1.7
OUI version       : 11.2.0.3.0
Log file location : /u01/app/oracle/product/ggs/cfgtoollogs/opatch/opatch2013-12-19_14-21-54PM.log

Lsinventory Output file location : /u01/app/oracle/product/ggs/cfgtoollogs/opatch/lsinv/lsinventory2013-12-19_14-21-54PM.txt

--------------------------------------------------------------------------------
Installed Top-level Products (1):

Oracle GoldenGate Core                                               12.1.2.0.0
There are 1 products installed in this Oracle Home.


There are no Interim patches installed in this Oracle Home.


--------------------------------------------------------------------------------

OPatch succeeded.